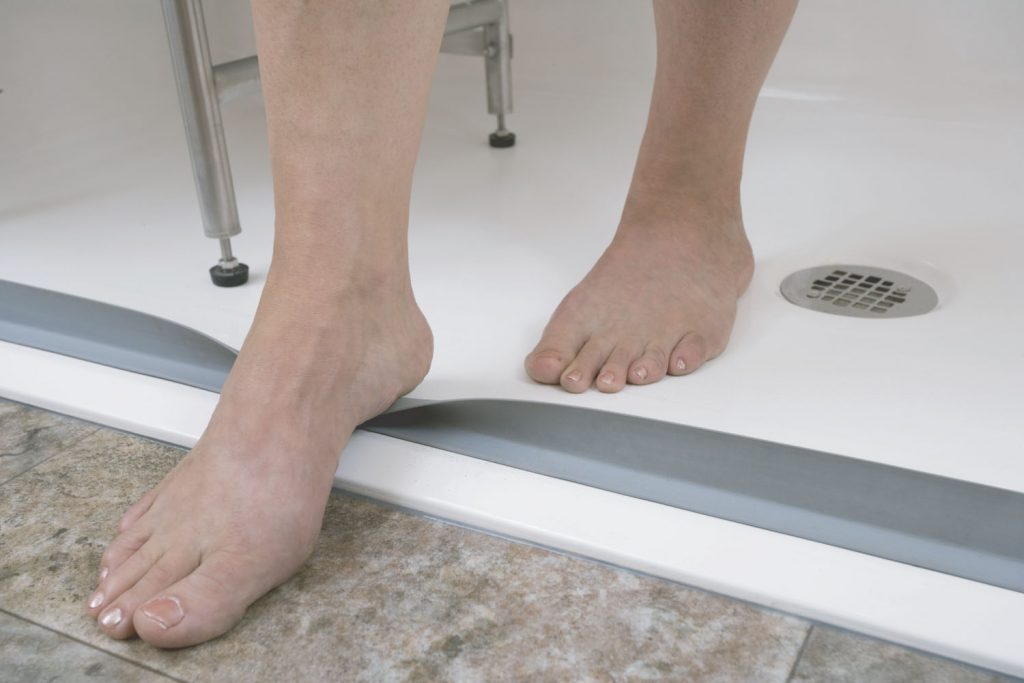
The zero barrier shower pan is extremely popular today for various reasons. The first is the ever-growing desire for open space and custom designed showers. The second reason comes with the ageing of the baby boomers and the trend to stay at home in the golden years. In order to have a handicapped accessible shower, a zero barrier is a requirement. The easiest way to create the zero barrier shower pan is the use of fabric shower pan material.

Select a plumber to do any rough-in work necessary for the drain. Even the most experienced home remodeler finds the waste pipes a huge task. If you already have a drain opening ready for the final drain attachment, you’re in good shape and ready to begin the zero barrier shower pan. Measure the area from the middle of the drain pipe to the outside wall of the shower. You need a 1/4 inch drop in slope for every foot that the center of the pipe is from the wall. If you’re working on an open space shower, you need the slope to begin about a foot beyond where the spray ends. Use this measurement to calculate the slope. If your wall ends 3 feet away, the slope is 3/4 inch. You may need to ramp up the area to the shower to achieve a smooth transition. The ideal situation is lowering the subfloor, which is possible in new construction but difficult in remodelling. Lay 15 pound felt paper on the floor. Overlap it at the seams. Put wire mesh on top of the felt and nail down every six inches. Set the drain in its place but avoid clamping it down. Protect the drain from the concrete by covering the opening with a seal of masking tape. Mix the concrete.
Use one part Portland cement for every three or four parts of sand. Make the mixture dry, but not so dry it crumbles. Build the outer edge the appropriate height. Lay a thin layer of concrete around the drain. Fill in the area between the two. Build a small bump at the threshold area and, if necessary, ramp down to the subfloor. Smooth the concrete by using a board. Check the slope with a level. Allow the concrete to dry overnight. Add the backerboard for any walls that you have. Cut out the appropriate areas for the shower fixtures before you hang it. Coat the top of the concrete with a layer of thinset and lay the precut membrane on top of it. Smooth the membrane flat.
Remove the top of the drain, lay the special fabric piece around the drain, and clamp the drain down again. Make sure the whole pan is covered, and then put cardboard on it to protect it while you finish the rest. Cover any seams where the wall connects to the floor. In order to do this, fold a strip of the fabric liner in half, apply thinset to the wall board six inches up and along the floor, six inches from the wall. Place the fold in the seam and smooth it to the wall. Cover all areas completely with the fabric. If you want to use the fabric waterproofing on the walls, hang it like wallpaper. Allow the area to dry overnight and then test it for its water seal. Plug the drain, fill the area with about an inch of water, and allow it to set overnight. If you see no sign of leakage and you still have the same water level, you’re waterproofed and ready to complete the zero barrier shower. If you tile, use a coat of thinset as the mortar to hold the tiles in place.